
Sushi is one of Dane and my favorite treats when we go out, but we thought it might be fun to try and create it at home. It was super intimidating at first, but we have had much success, so we thought we would share a few of our at home sushi secrets with you.
First you must gather your sushi inspiration (this is one of the best parts). When we went out for sushi we would pay attention to the ingredients in the rolls that we loved and make mental notes. We love any roll with avocado, sweet potato, cream cheese, chicken, crab or cucumber, so we have based most of our at home rolls off of these ingredients.
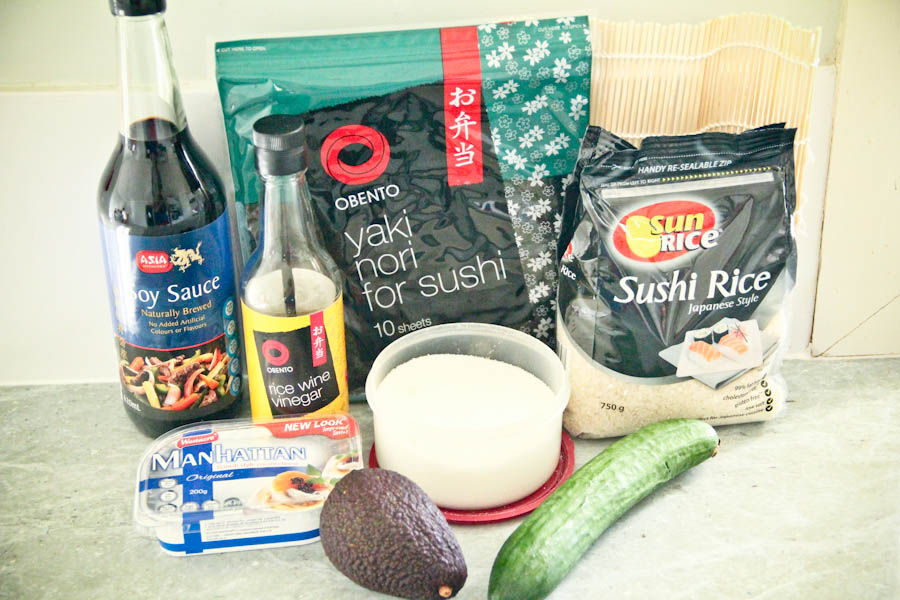
Collect your ingredients. For every sushi roll we make we use a sheet of yaki nori, which is dried sea weed and sushi rice. You will also need to collect whatever ingredients you would like in your sushi that meal. Tonight we have chosen avocado, cucumber, cream cheese, sesame seeds, breaded chicken fingers (can use thin chicken strips) and soy sauce for dipping. You will also need rice wine vinegar and sugar as part of your sushi rice recipe.

Making your sushi rice. First off, be sure you buy sushi rice. I can't emphasize this enough because it makes all the difference in the world. Simply follow the recipe on the bag. It is really simple to make. We actually do ours in a rice cooker, because it is easier, but the stove top directions work fine as well. Then stir in 1 TB of sugar and 1 TB of rice vinegar to the rice. Recipes always say not to do this in a metal bowl. I don't know what kind of crazy science experiment this might create, but I take their advice and grab a glass bowl for the mixing. After it is stirred in, let the rice cool.


While your rice is cooking, prepare your sushi fillings.
Cucumbers: peal, remove the seeds and slice into small thin strips.
Avocados: remove the pit, slice the avocado, and pull out of the peal.
Cream Cheese: remove from fridge so it can soften a bit for easy spreading.
Chicken Fingers: bake in the oven following the package directions. We average about 3 chicken fingers per chicken roll.


Sesame Seeds: place in a small skillet on your oven burner, cook on medium, stirring constantly until they are nicely toasted. As they cook they will release a very nice nutty flavor. Dane does this part for me. He's really good at it.

Just had to add this picture because as I was preparing dinner tonight, I peaked out the window to see my husband hand washing our table cloth for the dinner tonight. I am a blessed woman.

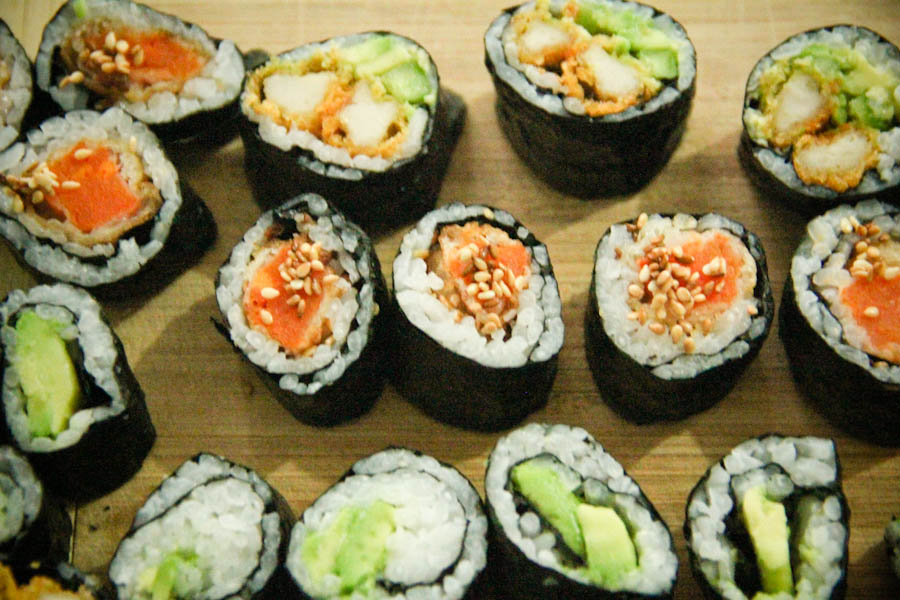
Now it is sushi making time. Here are the four roll varieties we are making tonight.
Roll Number One: Avocado + Cream Cheese + Cucumber
Roll Number Two: Chicken + Cucumber + Avocado
Roll Number Three: Tempura Battered Sweet Potato + Sesame Seeds (we have not perfected this roll yet, so I am not going to give you instructions on it just yet).
Roll Number Four: Avocado, yep that is it, and I LOVE it!

Place your yaki nori on a sushi mat. You don't have to have a sushi mat, but it is helpful in the process and they are really affordable. We bought ours for $1.50 (and that is in Australia folks). There is a shiny side and a dull side. Place shiny side down.

Next add a thin layer of cooled sushi rice. Some tips here. Sushi rice is super sticky. Dip your spoon and hands in water to keep it from sticking. Yes I spread the rice with my hands. They are the best tools I have in the kitchen. Another tip. Make this layer thin. Often you can get carried away with the rice layer which makes your sushi rolls way too fat. The rice is yum, but there is a lot more flavor to be added to this bad boy.

Add your ingredients to one end of the paper. We do each ingredient in a row. So a row of avocado, a row of cucumber and a row of cream cheese spread.

Now begin rolling. As you roll use the sushi mat to pull the roll tight. The stickiness of the rice will help it stick.

When you get to the end of the roll, simply dip your fingers in some water and moisten the paper. The paper will become sticky like an envelope, and then seal it shut. Now allow your roll to rest about 10 minutes, and then cut it into your desired width.

We line all of our sushi pieces on a cutting board for serving. To serve we use chopsticks and jar lids to hold our soy sauce, nothing like an upcycle project huh?
This is such a fun dinner to do because you can experiment and fit it to your liking. It is also a really fun meal to have with friends. So I hope you will give sushi at home a try.
Happy Eating,
The Kids Down Under
This post is dedicated to Brock & Brittany, the newest sushi addicts in our lives.
No comments:
Post a Comment